How To Go Live On Twitch: A Streamer's Guide to Success
So you're ready to dive into the exciting world of Twitch streaming? Fantastic! Going live on Twitch can seem daunting at first, but with a little preparation and these step-by-step instructions, you'll be broadcasting your gameplay, creative process, or just chatting with your community in no time. This guide covers everything from setting up your account to optimizing your stream for maximum viewership.
Setting Up Your Twitch Account and Stream
Before you can go live, you need a Twitch account and a solid streaming setup. Let's break down the essentials:
1. Create Your Twitch Account
This is the first and most obvious step! Head over to Twitch.tv and sign up for a free account. Choose a memorable and relevant username that reflects your streaming content. Think about your brand and what you want to be known for.
2. Download and Install Streaming Software
You'll need streaming software to capture your gameplay or screen and broadcast it to Twitch. Popular options include:
- OBS Studio (Open Broadcaster Software): Free, powerful, and highly customizable. Excellent for beginners and experienced streamers alike.
- Streamlabs Desktop: User-friendly with built-in features like alerts and overlays. A good choice for those who want a simpler setup.
- XSplit Broadcaster: A more professional-grade option with advanced features, but often comes with a subscription fee.
Choose the software that best suits your technical skills and budget. There are plenty of tutorials available online for each of these programs.
3. Configure Your Streaming Software
This is where the real work begins. You'll need to:
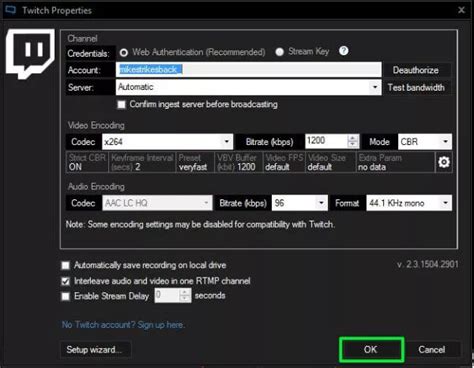
- Add your Twitch stream key: This is crucial for connecting your software to your Twitch account. You'll find this key in your Twitch dashboard under "Settings" -> "Stream Key." Keep this key private!
- Set up your scenes: Scenes allow you to switch between different camera angles, game overlays, and more. This is a great way to add visual interest to your stream.
- Add sources: This includes your game capture, webcam, microphone, and any other sources you want to display.
- Adjust audio and video settings: Test your microphone and webcam to ensure good quality. Experiment with different bitrates and resolutions to find the optimal settings for your internet connection.
Going Live on Twitch: A Step-by-Step Guide
Once your software is configured, it's time to go live!
1. Start Your Stream
In your chosen streaming software, click the "Start Streaming" button. You should see your stream previewing in the software.
2. Prepare Your Title and Description
Before hitting that "Go Live" button, craft a compelling title and description for your stream. This is your first impression on potential viewers. Use relevant keywords that accurately reflect your content. For example, instead of just "Gaming," try "Playing Elden Ring - Let's Conquer the Lands Between!"
3. Engage With Your Viewers
This is arguably the most important aspect of streaming. Interact with your chat, respond to questions, and create a welcoming community. Building a loyal audience takes time and effort, but the rewards are immense.
Optimizing Your Stream for Success
After your first stream, consider these optimizations:
- Improve your audio and video quality: Invest in a better microphone and webcam if necessary.
- Create engaging content: Think about what makes your stream unique and what viewers will want to watch.
- Use overlays and alerts: These can significantly enhance your stream's professionalism and viewer experience.
- Promote your stream: Share your stream on social media and other platforms.
Going live on Twitch is a journey, not a destination. Experiment, learn, and most importantly, have fun! The more you stream, the better you'll become at engaging your audience and creating a thriving community. Good luck, and happy streaming!
