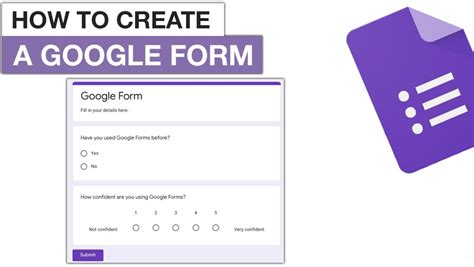
How To Make a Google Form: A Step-by-Step Guide
Creating a Google Form is easier than you think! This comprehensive guide will walk you through the process, from initial setup to customizing your form for optimal results. Whether you need a simple survey or a complex data collection tool, this tutorial will empower you to build the perfect Google Form.
Getting Started: Accessing Google Forms
Before you begin, ensure you have a Google account. If you do, navigate to your Google Drive. You can access Google Forms in a couple of ways:
- Via Google Drive: Click the "+ New" button in the top-left corner, then select "Google Forms."
- Directly: Search "Google Forms" on Google; this will take you directly to the Forms interface.
Once you've accessed Google Forms, you'll be presented with a blank form template, ready for your customization.
Building Your Form: Adding Questions and Sections
The core of your Google Form lies in its questions. Let's explore the various question types and how to add them:
1. Adding a Question:
Click on the "+ Add question" button to begin. You'll see a variety of question types available:
- Short answer: Ideal for brief, text-based responses.
- Paragraph text: Perfect for longer, more descriptive answers.
- Multiple choice: Enables users to select one option from a list. You can add images to multiple choice answers for better visual appeal.
- Checkboxes: Allows users to select multiple options from a list.
- Dropdown: Presents a list of options in a dropdown menu, ideal for cleaner forms.
- Linear scale: Great for rating scales (e.g., 1-5 stars).
- Multiple choice grid: Useful for comparing multiple items across different criteria.
- Date: For collecting date information.
- Time: For gathering time information.
- File upload: Allows users to upload files as responses.
2. Customizing Your Questions:
Each question type allows for customization:
- Required: Mark a question as "required" to ensure users answer it. This is particularly useful for crucial information.
- Question title: Craft clear and concise question titles that are easy to understand.
- Help text: Provide additional context or instructions to clarify the question's intent. This can improve response rates and data quality.
- Points: Assign points to questions (useful for quizzes or assessments).
3. Adding Sections:
To organize your form, consider using sections. This breaks down your form into logical groups, making it easier to navigate and complete. Click the three vertical dots to add a section. You can also add section titles and descriptions.
Refining Your Form: Customization and Settings
Once you've added your questions, you can customize your form's appearance and settings:
1. Theme and Colors: Click on the "Customize theme" option to alter the color scheme and fonts. This makes your form more visually appealing.
2. Form Title and Description: Add a clear, concise title and description to inform users of the form's purpose. Use relevant keywords for better searchability if sharing publicly.
3. Confirmation Message: Set a custom message to display after a user submits the form. This can thank them for their participation or provide additional instructions.
4. Responses: Navigate to the "Responses" tab to view collected data. You can export this data in various formats (e.g., CSV, spreadsheet) for further analysis.
5. Restricting Responses: You can limit the number of responses, require logins, or even set a deadline.
Sharing Your Google Form
Once your form is complete, you can share it using a variety of methods:
- Link: Copy the form link and share it through email, social media, or other platforms.
- Embed: Embed the form directly onto your website.
- QR Code: Generate a QR code for users to scan and access the form.
Remember to always test your form before distributing it widely to ensure everything functions correctly.
Advanced Tips for Optimized Google Forms
- Pre-fill responses: Save time by pre-filling certain fields for specific users.
- Collaborate with others: Allow others to edit the form for a collaborative approach.
- Use branching logic: Direct users to specific questions based on their answers (conditional logic).
- Integrate with other Google services: Connect the form with Google Sheets for seamless data management.
By following these steps and incorporating these tips, you’ll be able to create effective Google Forms for a variety of purposes, from simple surveys to complex data collection tools. Remember, clear communication and thoughtful design are key to creating a successful form.
