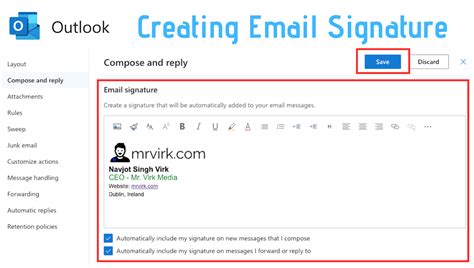
How to Make a Signature in Outlook: A Step-by-Step Guide
Creating a professional email signature in Outlook is crucial for branding and providing essential contact information. This guide walks you through the process, covering different Outlook versions and providing tips for optimization.
Why You Need an Email Signature
A well-crafted email signature is more than just your name; it's a mini-marketing tool and a way to ensure recipients can easily contact you. It should include:
- Your Name: Clearly displayed and in a professional font.
- Job Title: Helps recipients understand your role.
- Company: Provides context and brand recognition.
- Contact Information: Phone number, email address, website URL (consider a shortened link).
- Social Media Links (Optional): Include relevant professional social media profiles.
- Logo (Optional): Adds a professional touch and brand reinforcement.
Creating Your Outlook Email Signature: A Comprehensive Guide
The process varies slightly depending on your Outlook version. We'll cover the most common versions:
Creating a Signature in Outlook Desktop (Windows and Mac)
- Open Outlook: Launch your Outlook application.
- Access Signature Settings: The exact location varies slightly depending on your Outlook version. Generally, you'll find it under:
- File > Options > Mail > Signatures (for newer Outlook versions).
- Tools > Options > Mail Format > Signatures (for older Outlook versions).
- Create a New Signature: Click "New" to create a signature. Give it a name (e.g., "Main Signature").
- Compose Your Signature: In the large text box, type your signature information. You can use simple text formatting (bold, italics, underlining).
- Add a Logo (Optional): Click the "Insert Picture" button (usually an image icon) to add your company logo. Resize it appropriately.
- Format Your Signature: Use the formatting tools to adjust fonts, sizes, and colors for a polished look. Remember to keep it concise and visually appealing.
- Choose Signature for Accounts: Select which email accounts should use this signature from the dropdown menu.
- Save Changes: Click "OK" to save your new signature. Your signature should now automatically appear at the bottom of all your outgoing emails.
Creating a Signature in Outlook on the Web (OWA)
The process for creating a signature in Outlook on the Web (the online version of Outlook) is slightly different:
- Open Outlook on the Web: Access your Outlook account through a web browser.
- Settings: Locate the settings gear icon (usually in the upper right corner).
- View all Outlook settings: This usually leads to a more extensive settings panel.
- Mail > Compose and reply: Look for options related to signatures. The exact wording might vary depending on your Outlook Web App version.
- Add Signature: Follow the on-screen instructions to create and customize your signature, similar to the desktop version.
Tips for an Effective Email Signature
- Keep it Concise: Avoid overwhelming recipients with excessive information.
- Use Professional Fonts: Choose a legible and professional font like Arial or Calibri.
- Maintain Consistent Branding: Align your signature's style with your company's branding.
- Test Your Signature: Send a test email to yourself to ensure it looks correct.
- Update Regularly: Keep your contact information current to avoid confusion.
- Avoid Excessive Images: Large images can slow down email loading times.
By following these steps, you can create a professional and effective email signature that enhances your communication and brand presence. Remember to regularly review and update your signature to keep it current and relevant.
