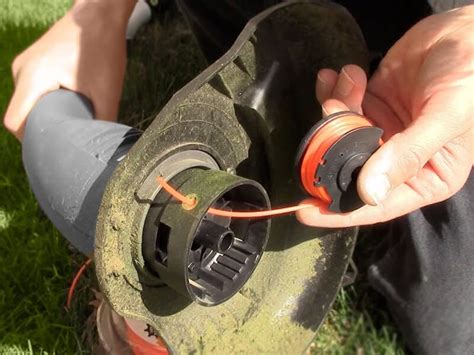
How to String a Weed Eater: A Step-by-Step Guide
So, your weed eater's run out of line, and you're staring at a tangled mess of weeds? Don't worry, restringing your weed eater is easier than you think! This guide will walk you through the process, no matter what type of weed wacker you have. We'll cover everything from choosing the right string to troubleshooting common problems. Let's get started!
Choosing the Right Weed Eater String
Before you even begin restringing, make sure you have the correct type of string. The packaging usually specifies compatibility, but here's what to look for:
- Diameter: This is crucial. Too thin, and the string will break easily. Too thick, and it might damage your trimmer head or not feed properly. Check your weed eater's manual for the recommended diameter.
- Type: There are different types of string, including round, square, and twisted. Square string is generally preferred for its durability and cutting power.
- Length: Buy a longer length than you think you'll need – you'll inevitably make a few mistakes along the way!
Tools You'll Need
Gather these essential tools before you start:
- New weed eater string: Make sure it's the correct diameter and type for your machine.
- Screwdriver (likely Phillips head): To open the trimmer head.
- Gloves: Protect your hands from cuts and abrasions.
- Scissors or wire cutters: To cut the string to the correct length.
Step-by-Step Guide to Restringing Your Weed Eater
The exact process may vary slightly depending on your weed eater model, but the general steps are consistent:
Step 1: Turn Off and Disconnect Your Weed Eater
Safety First! Always disconnect the weed eater from the power source (battery or power cord) before attempting any repairs or maintenance.
Step 2: Access the Trimmer Head
Locate the access panel or screws on your weed eater's trimmer head. Usually, you'll need a screwdriver to remove them. Refer to your user manual if you're unsure.
Step 3: Remove the Old String
Carefully remove any remnants of the old string. Discard the old string responsibly.
Step 4: Insert the New String
This step varies depending on your weed eater's design. Some models have a simple spool system, while others use a more complex tap-and-go system.
- For spool-type heads: Carefully feed the new string onto the spool, following the manufacturer's instructions. Ensure the string is wound tightly and evenly.
- For tap-and-go heads: Insert the new string into the designated holes, and then carefully thread it through the channels provided.
Step 5: Secure the String
Once the string is in place, close the trimmer head securely. Make sure all screws are tightened properly.
Step 6: Test the String
Turn your weed eater on and let the string feed out. If it doesn't feed correctly, check the string's alignment and tension. You may need to adjust it slightly.
Troubleshooting Common Problems
- String keeps breaking: You might be using the wrong diameter string or the string is too old. Make sure the string is the correct diameter and is new.
- String won't feed: Check for any clogs or obstructions in the trimmer head. Make sure the string is correctly aligned and wound.
- String is tangling: The string may be too long, or the trimmer head might be improperly adjusted.
Maintaining Your Weed Eater
Regular maintenance will keep your weed eater running smoothly and extend its lifespan. Check your weed eater's manual for specific maintenance recommendations. Remember to always use the correct type and diameter of string.
By following these steps, you can easily restring your weed eater and get back to tackling those pesky weeds! Remember to always prioritize safety and consult your weed eater's manual for model-specific instructions.
