How to Add a Redirect URL: A Comprehensive Guide
Adding a redirect URL is a crucial aspect of website maintenance and SEO. It ensures users and search engines are directed to the correct page, even if the original URL has changed. This guide will walk you through various methods, from simple redirects in your website's .htaccess file to using your website's control panel.
Why Redirect URLs Are Important
Before diving into the how-to, let's understand why redirects are essential:
- Improved User Experience: Redirects prevent users from encountering frustrating "404 Not Found" errors. A smooth transition to the correct page keeps visitors engaged and happy.
- SEO Benefits: Redirects preserve the SEO value of your old URLs. When a page moves, a redirect ensures that the link juice and ranking power are passed on to the new location. This prevents a drop in search engine rankings.
- Website Maintenance: When restructuring your website or changing URLs, redirects are necessary to manage the transition seamlessly.
Methods for Adding Redirect URLs
The specific method for adding a redirect URL depends on your website's hosting and setup. Here are some common approaches:
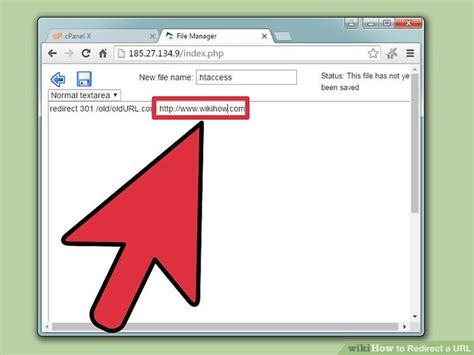
1. Using .htaccess (Apache Servers)
This method works for websites hosted on Apache servers, which are very common. You'll need access to your server's files via FTP or your hosting control panel. The .htaccess file is a powerful tool for website configuration.
301 Redirect (Permanent): Use a 301 redirect when the page has permanently moved.
Redirect 301 /old-page.html http://www.yourwebsite.com/new-page.html
Replace /old-page.html with the old URL and http://www.yourwebsite.com/new-page.html with the new URL.
302 Redirect (Temporary): Use a 302 redirect when the page's move is temporary.
Redirect 302 /old-page.html http://www.yourwebsite.com/new-page.html
Important Considerations for .htaccess:
- File Existence: Ensure the
.htaccessfile exists in your website's root directory. If not, create it. - Syntax: Pay close attention to syntax; even a small mistake can break your website.
- Testing: Always test your redirects after implementation to ensure they work correctly.
2. Using Your Website's Control Panel
Many hosting providers offer user-friendly interfaces to manage redirects without directly editing files. Look for options like "Redirect Manager," "URL Rewrites," or similar in your cPanel, Plesk, or other control panel. These typically involve inputting the old and new URLs and selecting the redirect type (301 or 302). This is often the easiest and safest method for beginners.
3. Using a Website Builder's Redirect Feature
If you use a website builder like Wix, Squarespace, or WordPress.com, they usually have built-in redirect functionalities within their settings. Check their help documentation for instructions.
4. Server-Side Redirects within your Code (Advanced)
For developers, adding redirects within your server-side code (e.g., using PHP, Python, Node.js) offers more granular control but requires programming knowledge. This approach is generally only necessary for complex redirect scenarios.
Choosing the Right Redirect Type: 301 vs. 302
-
301 (Permanent Redirect): This signals to search engines that the page has permanently moved. It passes link equity and ranking signals to the new URL. Use this for permanent changes.
-
302 (Temporary Redirect): This signals a temporary move. Link equity is generally not passed as effectively. Use this only for temporary redirections.
Checking if your Redirect Works
After implementing a redirect, use tools like:
- Your Browser: Simply visit the old URL and see if you're redirected correctly.
- Online Redirect Checkers: Numerous online tools can check if a redirect is working and what type of redirect is being used.
By following these steps, you can confidently add redirect URLs to your website, ensuring a seamless user experience and maintaining your website's SEO performance. Remember to always back up your files before making any changes to your website.
