How To Use CapCut: A Beginner's Guide to Mobile Video Editing
CapCut is a free and powerful mobile video editing app taking the internet by storm. Its intuitive interface and impressive features make it accessible to beginners while offering enough depth to satisfy more experienced editors. This guide will walk you through the basics, helping you create engaging videos in no time.
Getting Started with CapCut
Before diving into editing, you need to download the app. You can find CapCut on both the Apple App Store and the Google Play Store. The download is free, and there's no need for a complicated sign-up process.
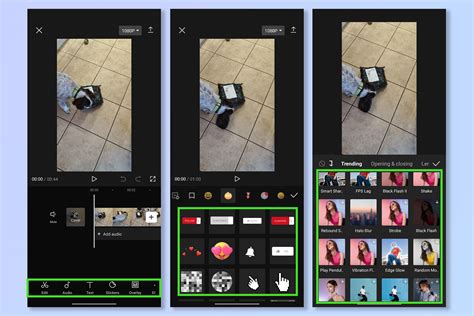
Once installed, launch CapCut. You'll be greeted with a clean and straightforward interface. The app's design makes navigating the various tools and features surprisingly easy.
Importing Your Footage
The first step in any video editing project is importing your footage. CapCut allows you to import videos from your phone's gallery, easily adding clips to your project timeline. You can also directly record video within the app itself.
Understanding the Timeline
CapCut's timeline is simple to understand. The video clips are arranged horizontally, showing their duration and order within your project. This visual representation makes it easy to see how your video will flow.
Basic Editing Techniques
Now for the fun part: editing! Here are some fundamental techniques:
Trimming Clips:
Precisely trimming your clips is crucial for a polished video. CapCut offers easy-to-use trimming tools. Simply tap and drag the edges of a clip on the timeline to adjust its length.
Adding Text:
CapCut's text tools allow you to add titles, subtitles, and other text overlays to your videos. Experiment with different fonts, styles, and animations to create visually appealing text. Pro-Tip: Keep your text concise and easy to read.
Adding Music and Sound Effects:
Adding audio is essential for setting the mood and enhancing your video's storytelling. CapCut's library provides royalty-free music and sound effects, making it easy to find the perfect audio to complement your visuals. You can also import your own audio files.
Applying Filters and Effects:
CapCut offers a wide variety of filters and effects to enhance the look of your videos. Experiment with different options to find the perfect aesthetic for your project. Remember, moderation is key! Too many effects can make your video look cluttered.
Transitions:
Smooth transitions between clips are vital for a professional-looking video. CapCut provides a range of transitions, from simple fades to more dynamic options.
Advanced Techniques (for when you're ready!)
Once you've mastered the basics, consider exploring CapCut's more advanced features:
- Speed Adjustment: Change the speed of your clips to create slow-motion or fast-motion effects.
- Keyframes: Allows for precise control over animations and effects over time.
- Chroma Key (Green Screen): Remove backgrounds from your clips and replace them with other images or videos.
- Templates: CapCut provides many pre-made templates to get you started quickly.
Exporting Your Video
Once your video is complete, exporting it is straightforward. CapCut lets you choose the resolution and quality of your final video. Higher resolution means a better-looking video, but it will also result in a larger file size.
Mastering CapCut: Tips and Tricks
- Practice regularly: The more you use CapCut, the better you'll become at using its features.
- Experiment with different effects: Don't be afraid to try new things and see what works best for your videos.
- Keep it simple: Avoid over-editing. A clean, well-paced video is more engaging than one cluttered with effects.
- Watch tutorials: Numerous tutorials are available online to help you learn more advanced techniques.
By following this guide and practicing regularly, you'll be well on your way to creating stunning videos with CapCut! Happy editing!
